
Trazet Detailed Product Handbook
1. Getting Started
Creating an Account
- Step-by-step guide to registering a new account
To create a Trazet account, you must set up a new account by providing the following details:
Note: If you or your company already has an account with Trazet, do not register a new account. Please contact the account owner to obtain a new login to access Trazet. - Name: Enter your full name.
- Company: Provide your company name. For personal use, re-enter your name.
- Email: Input a valid email address.
- Country: Select your country from the provided list.
- Phone Number: Enter your contact phone number, starting with the country code.
- Password: Create a strong, memorable password. Ensure you remember it, as it will be required to sign into the platform.
After entering all the required details, click Continue to complete the registration process.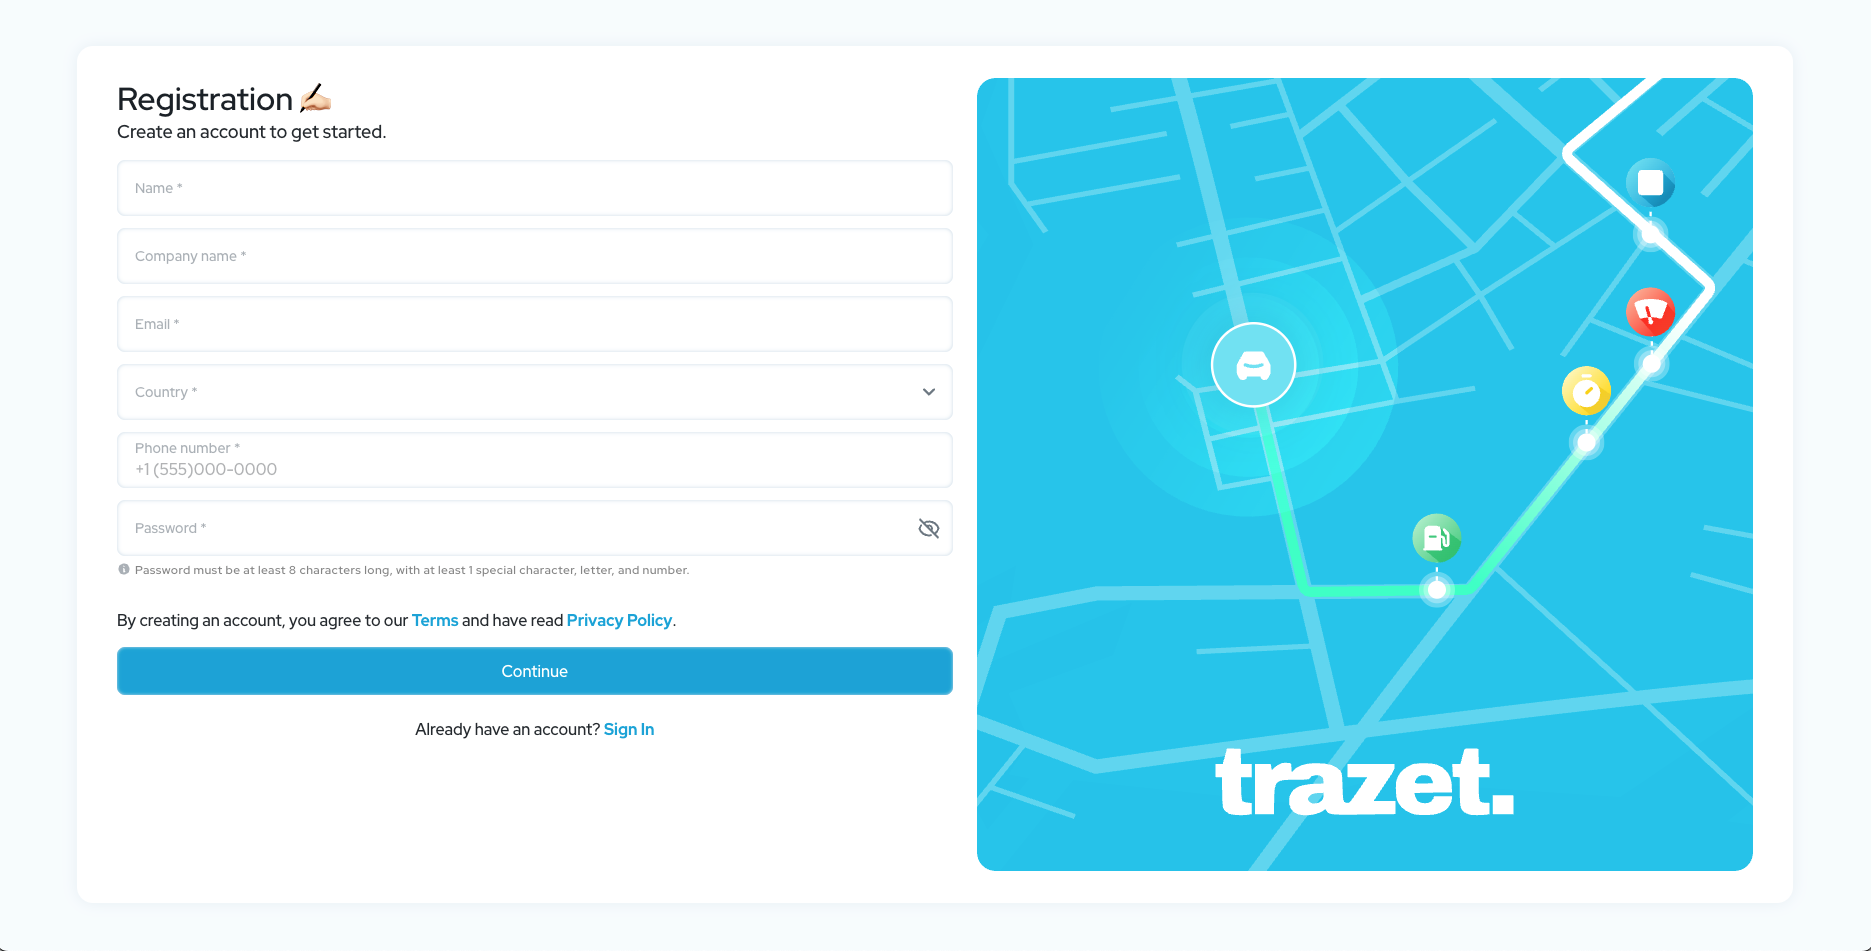
Signing In and Password Management
- How to sign in to the platform
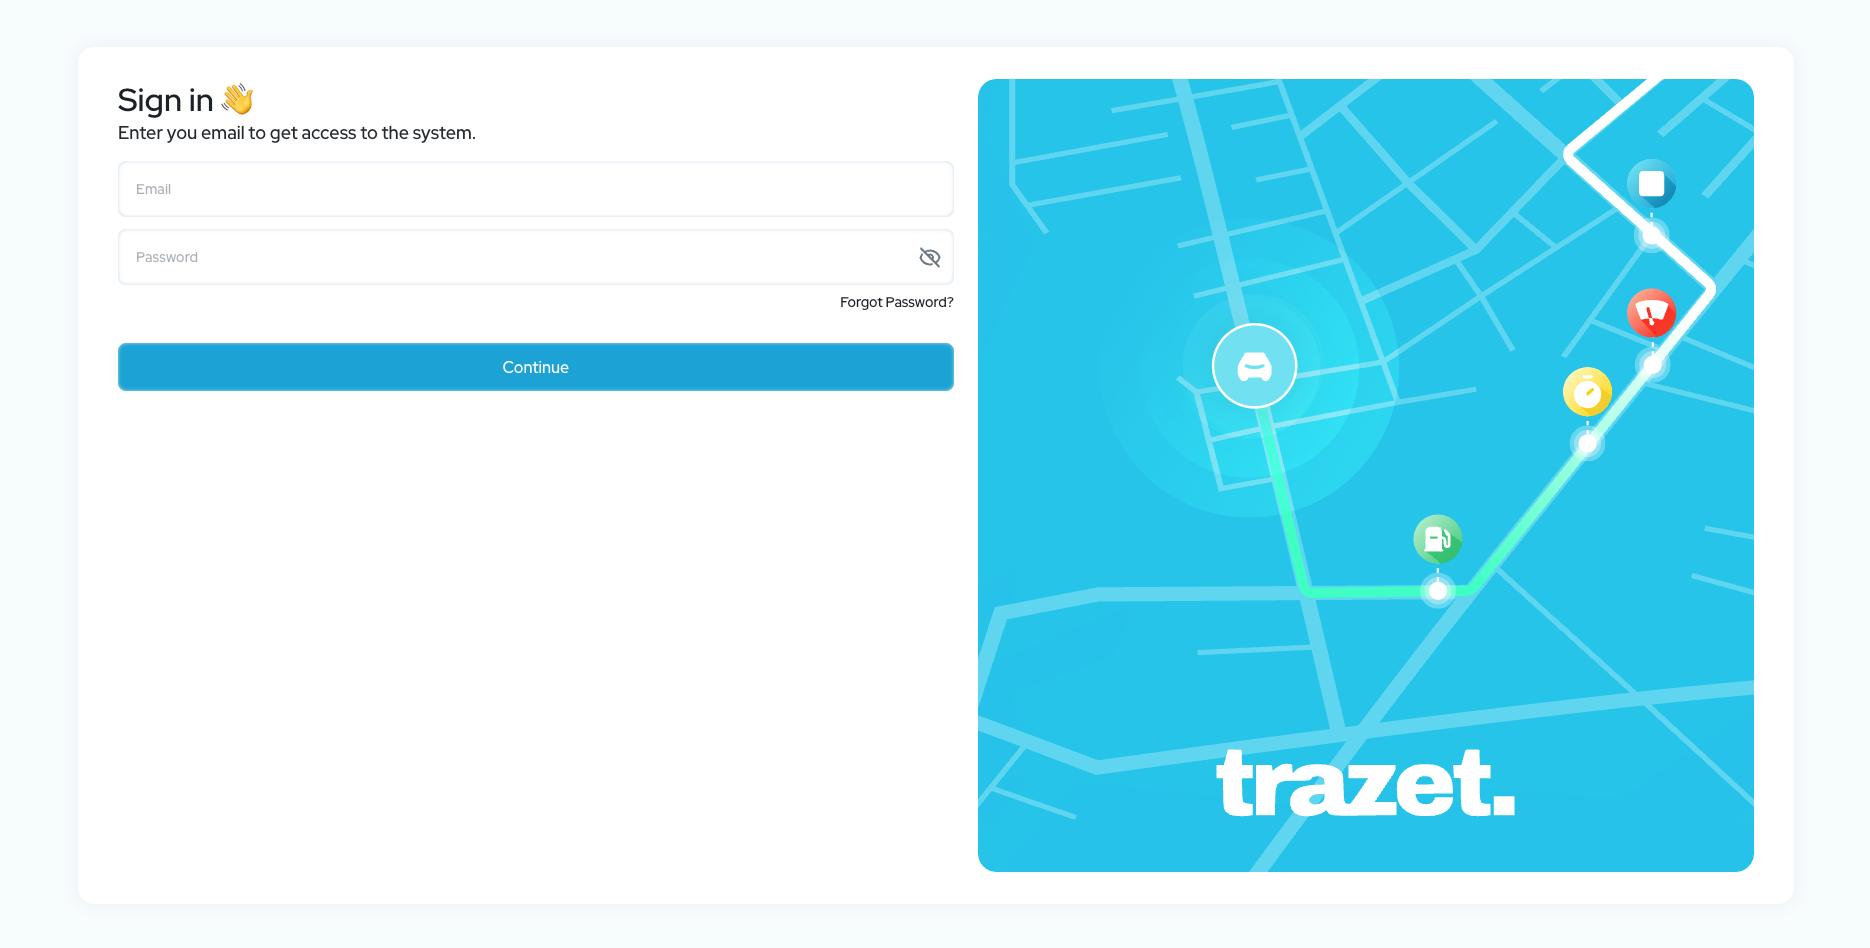
To sign in to the Trazet application, enter the email address used during account registration and the corresponding password.
Steps to reset a forgotten password
If you have forgotten your password, follow these steps to reset it:
- On the sign-in page, click Forgot Password?
Step 1: Enter your email address. The application will verify your email and send a verification code to your email address.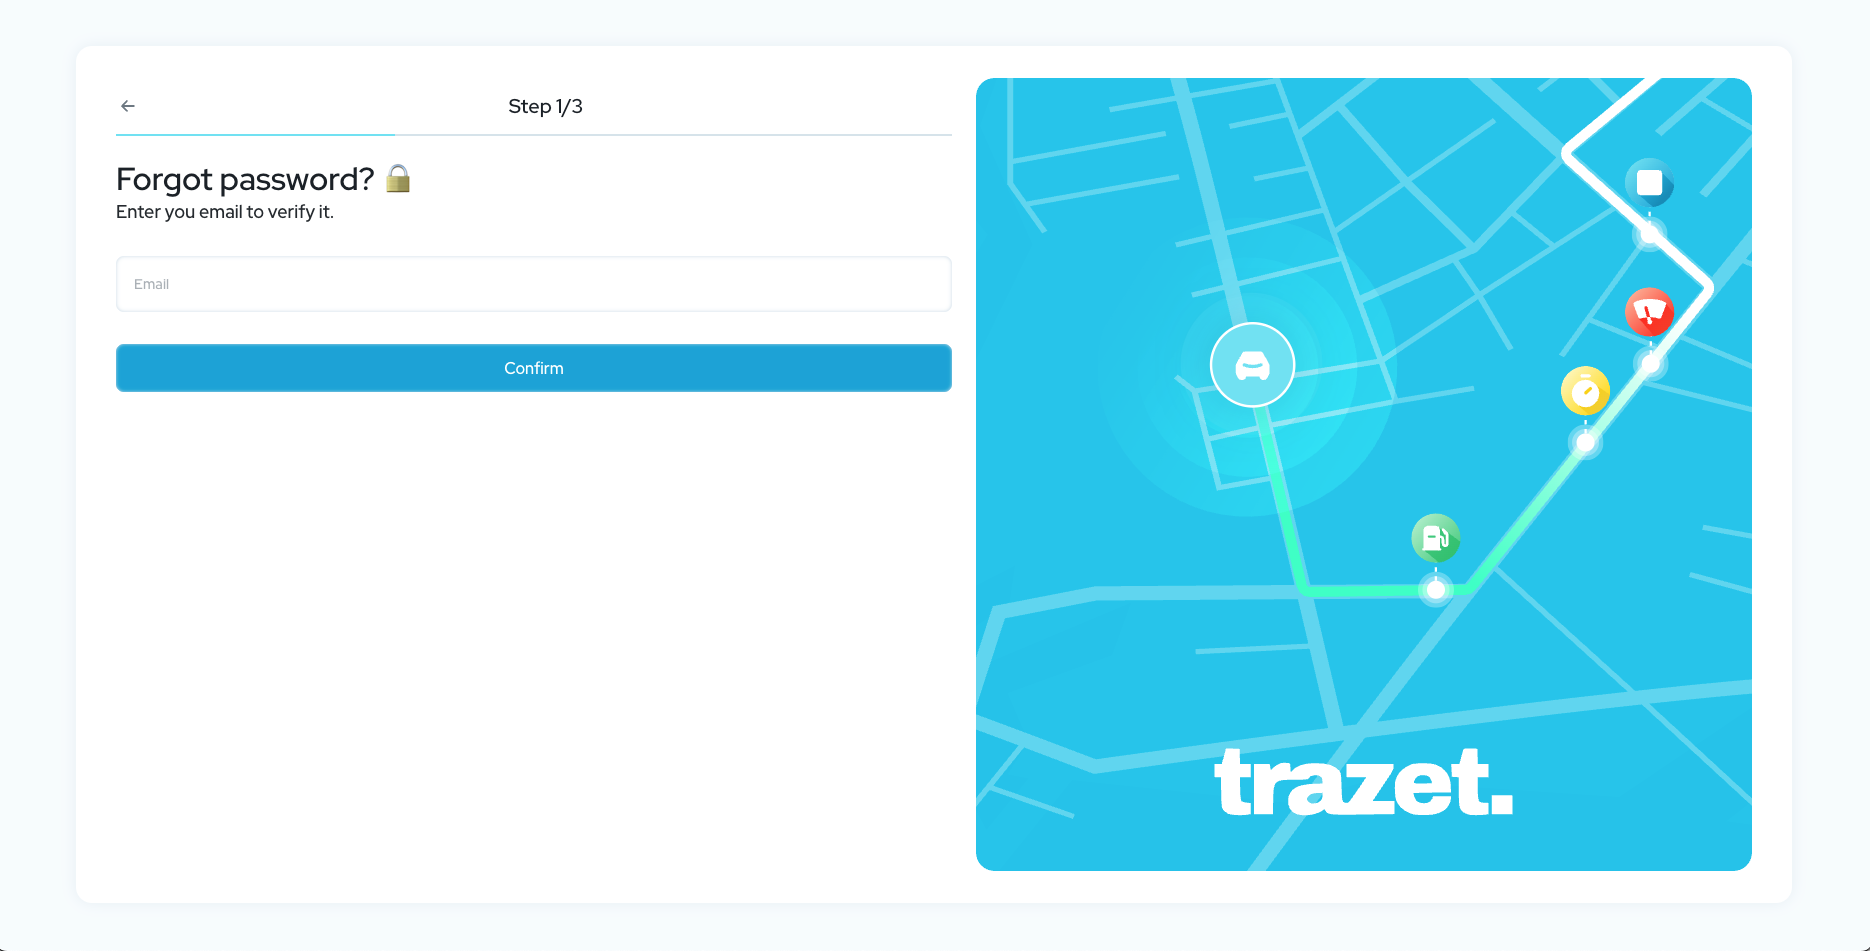
Step 2: Enter the verification code received via email.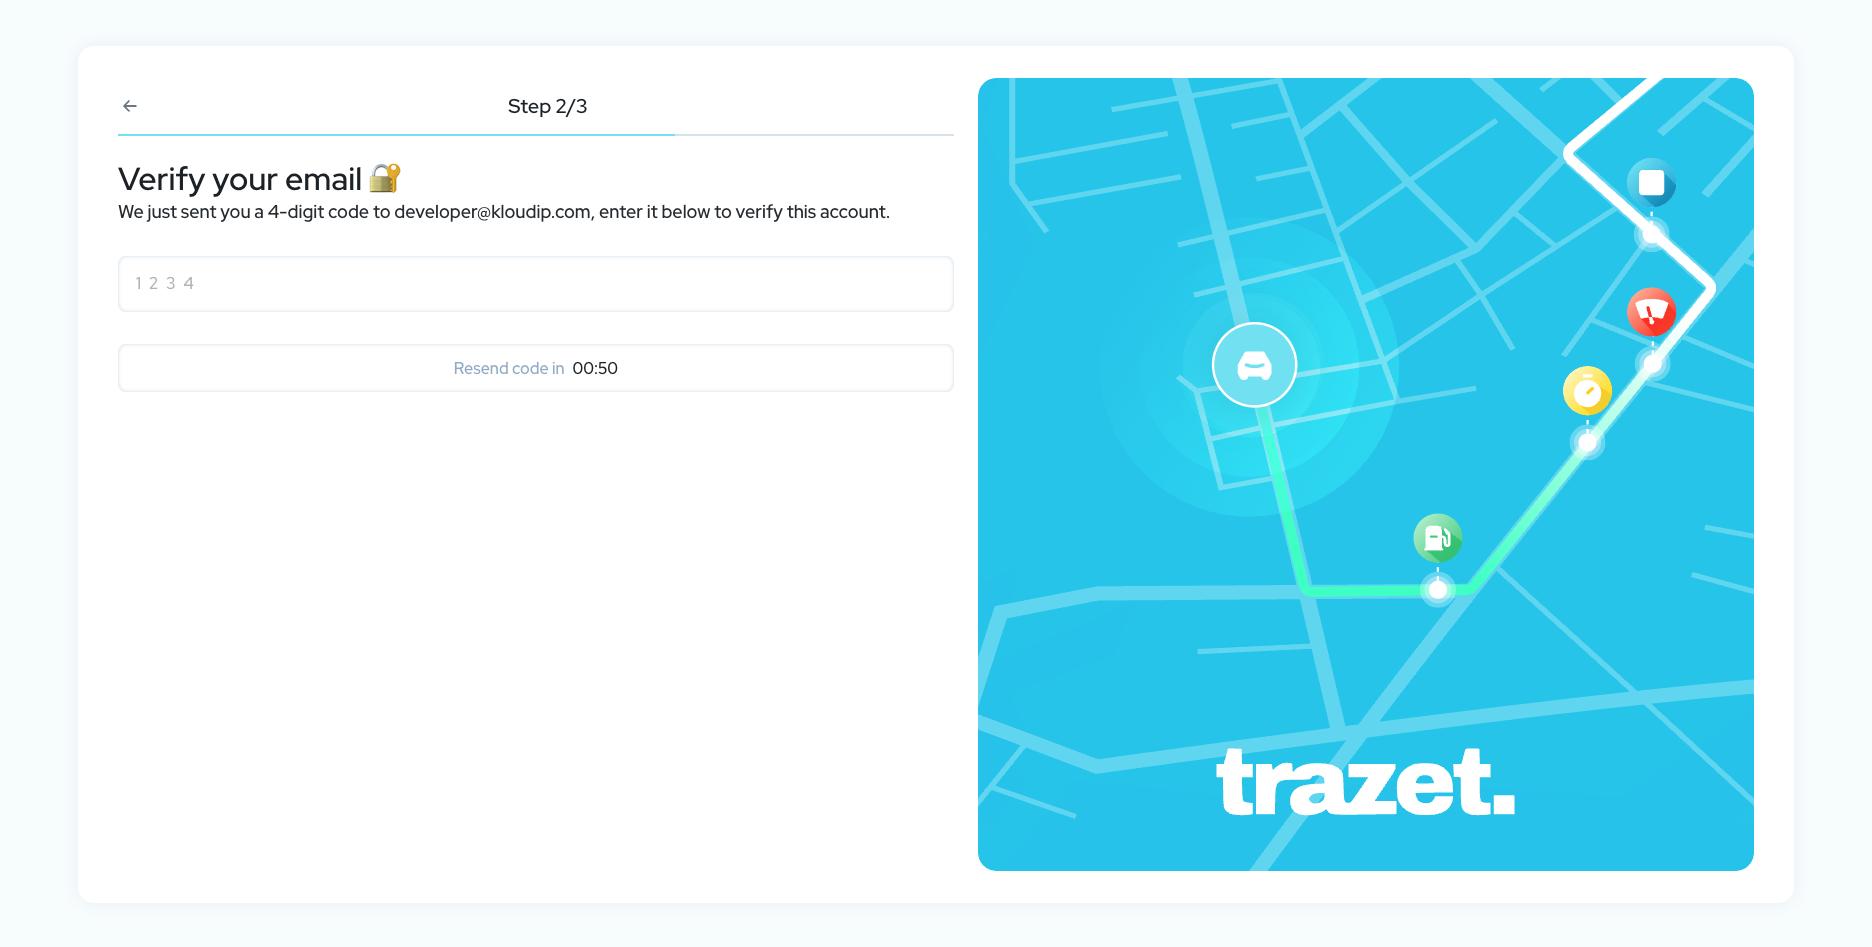
Step 3: If the code is correct, the application will prompt you to set up a new password. Enter a strong, complex password. Once the new password is successfully set, you can sign in to the Trazet application.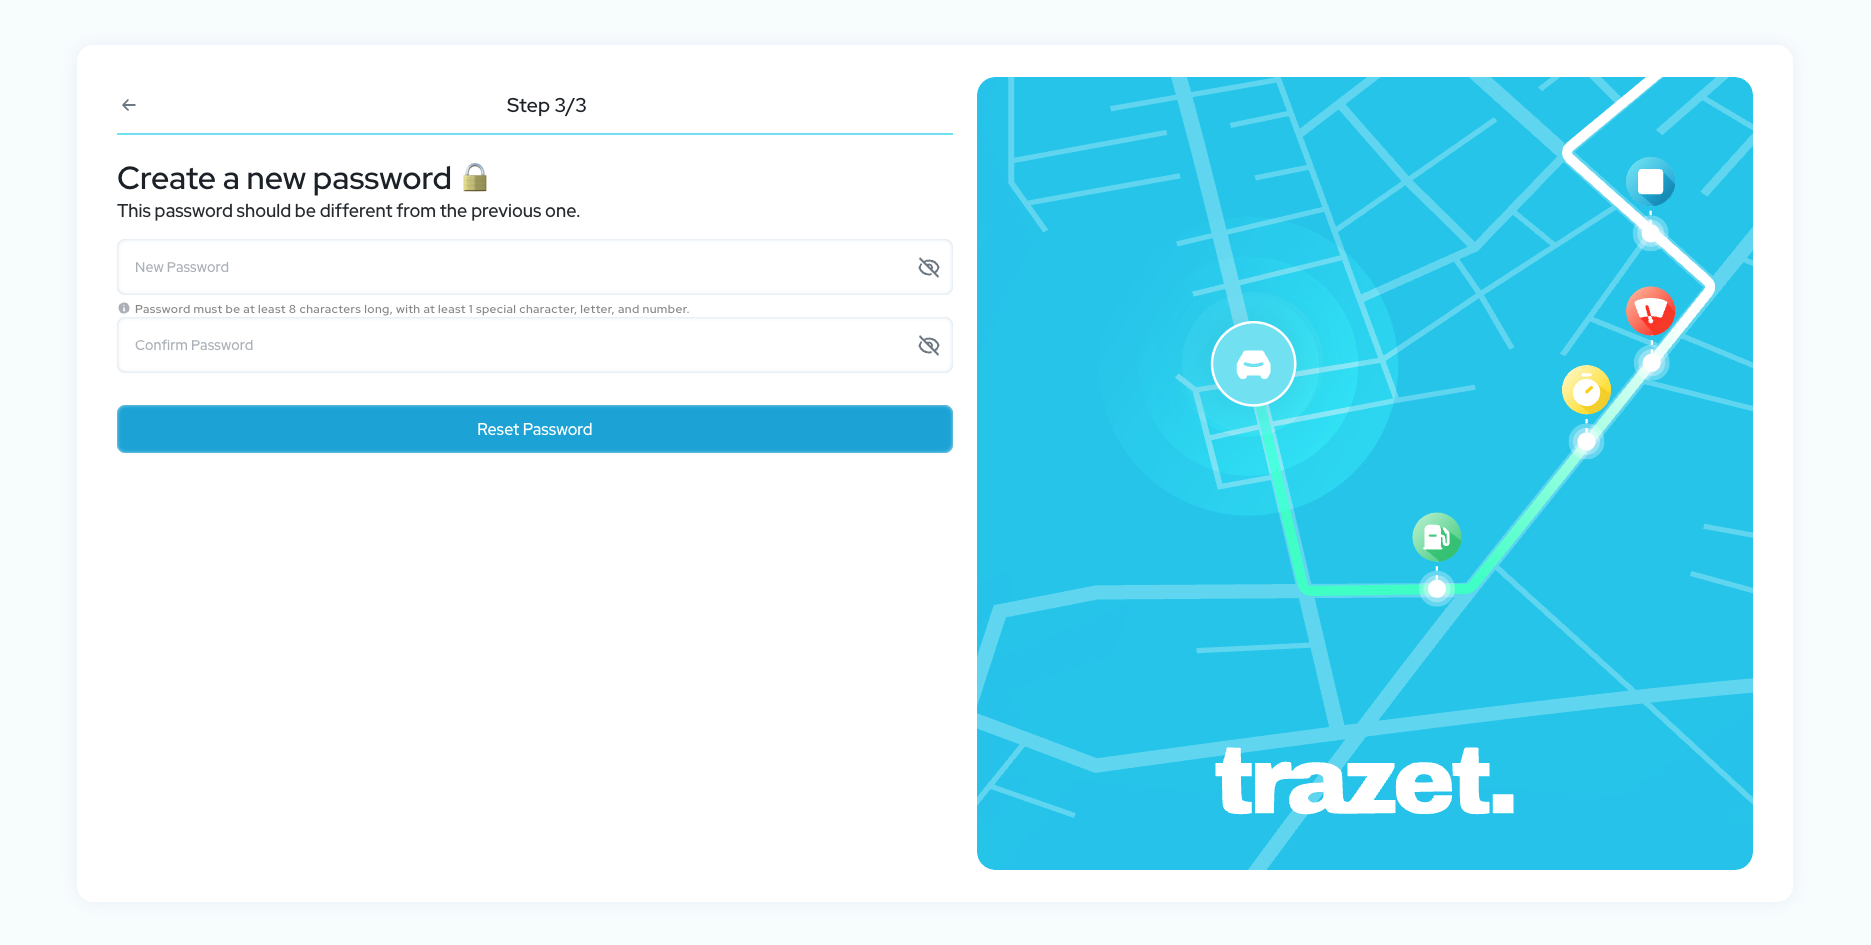
Note: If you do not receive the verification code, you can request to resend the code after a 1-minute wait.
Password Security Tips
- Use a 8+ character password with letters, numbers, and symbols.
- Avoid personal info or common words.
- Don’t reuse passwords across platforms.
- Use a password manager for secure storage.
- Update passwords every 6 months or after a suspected breach.
2. Devices
- Adding New Device
Steps to Add a New Device
Navigate to the Devices tab and click Add New Device. Alternatively, from the main dashboard, locate the "+" icon in the top right corner of the map section to initiate the process.
When the New Device dialog box appears, enter the following details: - Device Name: Assign a name, such as the vehicle plate number if the device is installed in a vehicle, or any preferred name for easy recognition in the application.
- UID: Enter the device’s IMEI number. Ensure accuracy, as the system identifies devices based on this unique identifier reported by the device.
- Phone Number: Input the SIM card phone number in international format, starting with the country code followed by the number (e.g., +12025550123).
- Device Icon: The default icon is set to a car. To choose a different icon, click on the preferred icon from the available options.
Once completed, click Save and Continue to register the device.
- Device Name: Assign a name, such as the vehicle plate number if the device is installed in a vehicle, or any preferred name for easy recognition in the application.
- Importing Devices
For adding multiple devices simultaneously, select the Upload Excel File option in the New Device dialog box. Upload an Excel file containing device details and click Submit to import them into Trazet.Ensure the file uses the compatible template, which can be downloaded within the dialog box by clicking Download Template.
After adding or importing devices, they will appear in the device list. If a device is reporting to the Trazet platform, the "Last Update" time will indicate when the device last sent information. You can return to the "Live Tracking" page to view the device’s location on the map.For configuring hardware devices, please refer to the device configuration manual provided with the device.
- Managing Registered Devices
You can manage existing devices from the Devices tab. The table displays all connected devices with the following details: - Name: The assigned device name.
- Status: Indicates whether the device is online or offline.
- UID: The device’s IMEI number.
- Category: The device category.
- Last Update: The date and time when the device last reported to the platform.
Hover over a device row to reveal available options:
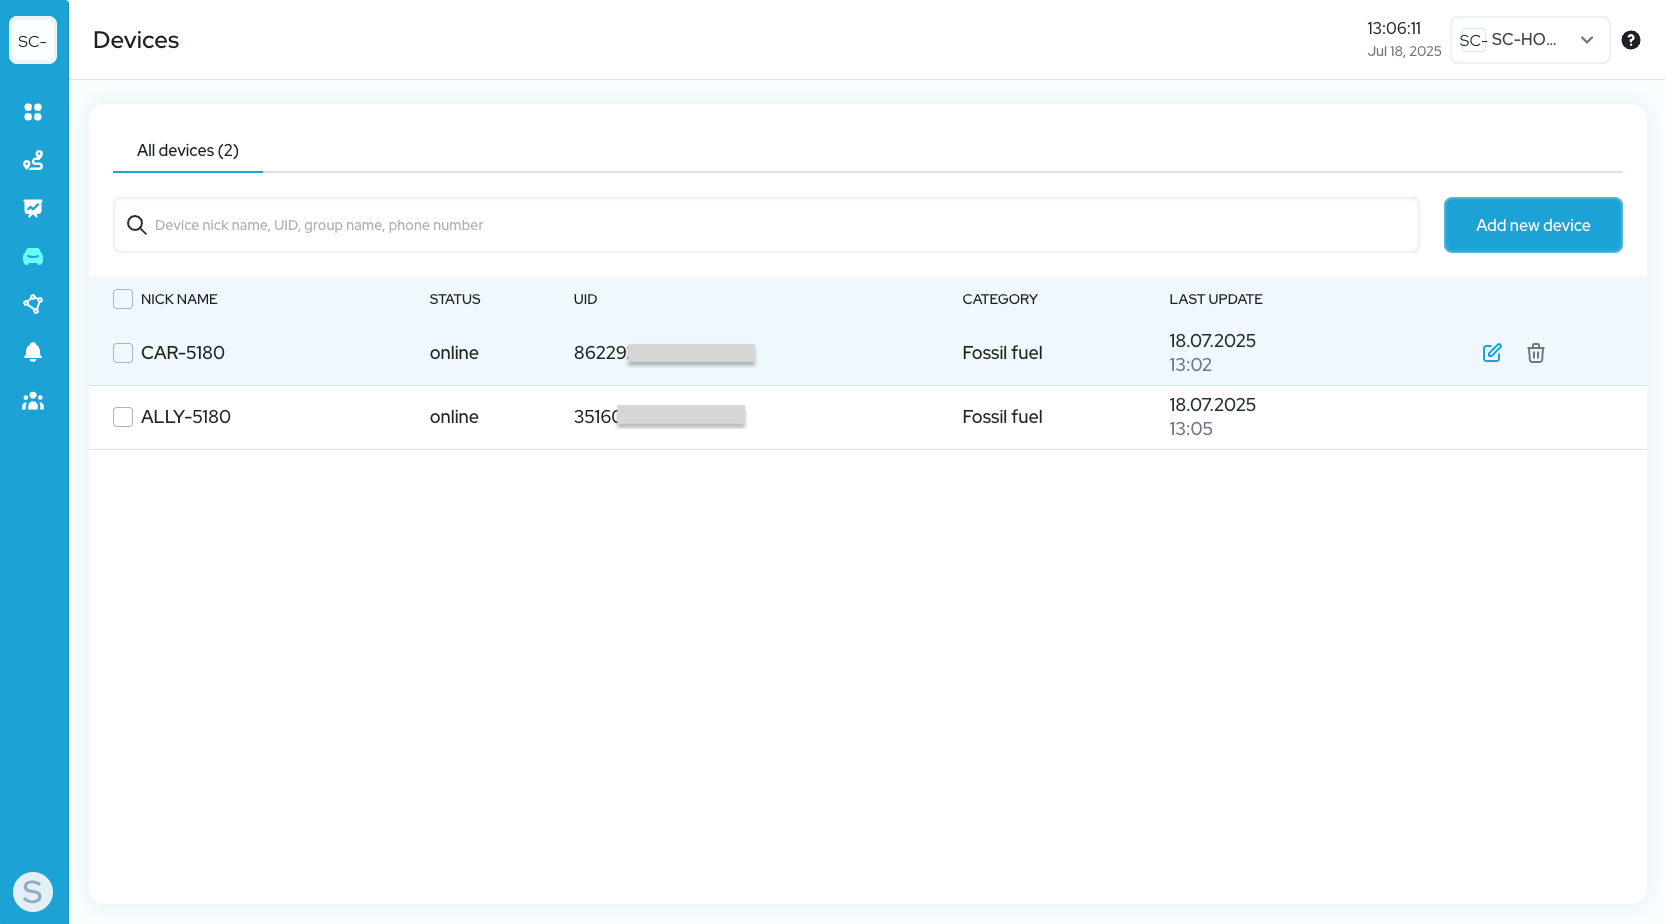
- Edit: Modify the device details.
- Delete: Remove the device from the Trazet application.
Use the search bar to quickly find a specific device by its name or UID.
3. Main Dashboard
Overview of Features
- Introduction to the main dashboard interface
A sleek, user-friendly hub designed to revolutionise how you monitor your devices.Experience a dynamic snapshot view of your entire fleet. - Map:
It features a detailed map displaying real-time device locations. You can zoom in or out using the +/- buttons on the map. To switch to a different map layer, click the "map icon" and select your preferred option from the available list. The search box at the top right corner of the map section allows you to search for a specific device and view its location.
- Device Statuses:
This section indicates the number of devices with specific statuses, including Online, Offline, Stationary, Idling, Moving, and Alarms.
- Available Status Categories and Their Meanings:
- Online: The number of devices that are online and have recently reported data to the platform.
- Offline: Devices that have not communicated with the platform or not reported any recent data.
- Stationary: Devices that are not moving.
- Idling: Devices that are not moving with the ignition turned on.
- Moving: Devices that are currently in motion.
- Alarms: The number of devices that have sent alarms, such as power loss or speeding.
Clicking on a specific status box displays a list of devices with that status below.
- Fleet Activity Section:
This area presents statistics for all devices under your account, including Idling Duration, Stationary Duration, Total Mileage, Moving Duration, and Number of Violations. By default, it displays data for the current date, with the option to select a custom date using the calendar date picker.
- Fleet Activity Expanded View
To explore further details, click on any widget in this section. This will display a chart highlighting the top ten devices in the selected category. For a comprehensive view of data across all devices, click the "Detailed Breakdown" button. You can also sort the data by clicking the sort icon to arrange it from lowest to highest or highest to lowest.
- Individual Device Statistics:
While the Fleet Activity Section offers a comprehensive overview, dive deeper with detailed stats for a single device, click the device icon on the map or select the "Device statistics" icon from the device list to access individualized data for the current date. Customize the timeframe using the calendar, and explore the latest sensor values, Idle Time, Parking, Violations, Mileage, Moving Duration, and a dynamic Speed Chart. Switch to the "Last Activity" tab to review events within the selected interval, or click the "Track" icon to visualize a detailed timeline and GPS track on the map.
4. Live Tracking
Live Location Tracking
Live Tracking Features:
The live tracking page empowers you to monitor your devices with ease. It presents a comprehensive list of devices alongside their real-time locations on the map, while also providing access to essential sensor information.The date and time indicate when each device last reported to the platform.
Device Panel:
Located on the left side, this panel displays a list of all devices.
- Use the search box to quickly find a specific device by its name or UID.
- Apply the filter to sort devices by Moving or Stationary status.
- Toggle the "Show All on Map" checkbox to display or hide devices on the map.
- Click the "See on Map"
icon to zoom in on a specific device, and use the "Eye Icon"
to show or hide individual devices on the map.
- Click on the "Track"
 icon to draw the device’s track for the current date, complete with a detailed timeline.
Device Card:
The device card offers a simple overview of the device’s status and location, making it easy to track key details at a glance.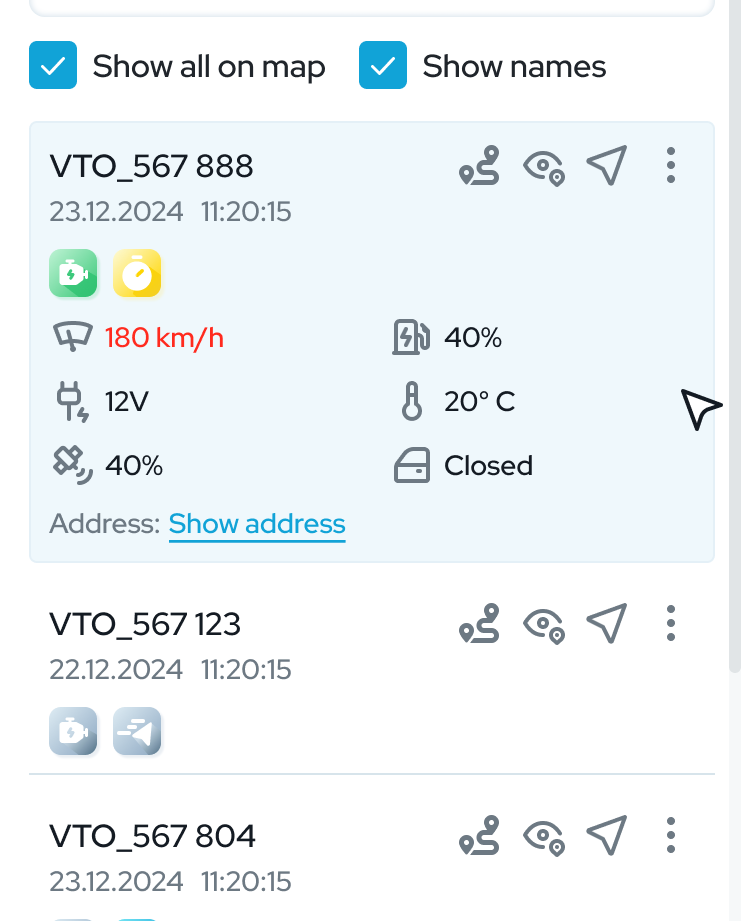
- Click on a device name to expand its card for more details.
- The Engine icon reflects the ignition status—green
when on , grey
when off.
- The Motion icon turns green
during movement, grey
when stopped, and yellow with a small clock
when idling. A blue "P" icon
appears when the device is stationary.
- Click "Show Address" to view the current location’s address.
- Sensor Information:
- The device card includes key sensor data such as Speed, External Voltage, and Number of Satellites.
- Icon Colors by Device Status: Trazet enhances user experience by using color-coded icons on the map that dynamically change based on device status, ensuring quick and intuitive recognition.

Moving: Represented by a green icon , indicating devices in motion.
Stationary: Marked with a blue icon, signifying stationary devices.
Idling: Displayed with a yellow icon, denoting devices with ignition on but not moving.
When a device is selected, a gradient effect surrounds the icon, highlighting it for better visibility.
- Timeline and Track
Timeline and Track Features: The Trazet timeline and track functionality lets you dive into your device’s history with ease. To create a timeline and track, click the "Track" icon on the device card.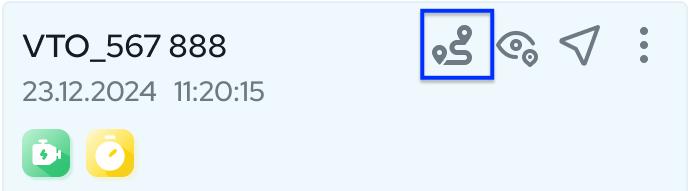
by default, it generates the track for the current date. Use the calendar to set a custom time interval of your choice to view the corresponding timeline and track. The timeline displays a detailed history of device incidents such as engine on/off, movement start/stop, parking events, geofence entry/exit, speed violations, and trip details within the selected period.
The device’s track is drawn on the map for a clear visual representation. Click on any event in the timeline to zoom into its exact location on the map.
- Timeline: View past device activity to review historical data and track incidents over time.Monitor and analyze data to gain valuable insights into device behavior and performance trends.
- Track Playback: Replay device movements to visualize the path taken over time. Use the play button at the top of the timeline event card to start playback, and pause it as needed to review specific moments.
- Trip Information in Timeline: The timeline card displays the total distance traveled at the top. Additionally check the timeline details section for a breakdown of trip specifics, including Max Speed, Average Speed, Mileage, and Duration.
- Full Map View Option: If you prefer a full map view, click the collapse button on the timeline card to minimize it, giving you an unobstructed view of the map.
5. Geofences
Geofence Overview: Geofences in Trazet allow you to monitor and manage the movement of your devices within defined geographic zones. Receive real-time alerts when a device enters or exits a geofence, and access detailed reports in the Reports section to track which devices have entered or exited specific geofences, including the duration spent inside each zone.
Geofence Types
- Circle: A simple, circular geofence defined by a center point and radius, ideal for monitoring devices in a uniform area like a parking lot or delivery zone.
- Polygonal: A customizable geofence created by connecting multiple points to form a polygon, perfect for irregular shapes such as property boundaries or complex route.
- Polygonal: A customizable geofence created by connecting multiple points to form a polygon, perfect for irregular shapes such as property boundaries or complex route.
Creating Geofences
- Steps to Create a Geofence
Navigate to the Geofence tab. In the top right corner of the map section, you’ll find two icons representing a polygonal geozone and a circular geozone. Click the icon corresponding to the type you want to create.
This action opens the Geofence work panel on the left side, where you can configure the following:- Name of the Geofence: Enter a unique name for the geofence.
- Description: Add optional information for future reference (e.g., purpose or location details).
- Devices: Select the devices to link to the geofence to receive notifications for entry or exit events.
- For Circle Type: You’ll be prompted to enter Latitude and Longitude if known; otherwise, click on the desired location on the map to set it. Specify the Radius in meters and choose a Geozone Color for visibility.
- For Polygonal Type: Click on the map to set the boundary points, forming the geozone shape.
Once all steps are complete, click the Add New Geozone button to save your geofence. - Managing Geozones: Created geozones appear in the Geozone work panel. Click a geozone name to center the map on it for viewing. To edit or delete a geozone, click the three dots next to its name and select the desired option.
- Name of the Geofence: Enter a unique name for the geofence.
- Import Geofence Data
This feature enables you to import multiple geozones efficiently using supported file formats. Trazet supports importing from XLSX or KML files. - Steps to Import: Click the Upload File button to open the Add New Zone dialog box. Drag and drop the file from your computer or click to upload it, then click Submit.
- Important Note: For XLSX imports, ensure you use the correct template. Download a sample template by clicking Upload File and selecting Download Template.(XLSX suppports only Circle type) please make sure to user KML for
- Steps to Import: Click the Upload File button to open the Add New Zone dialog box. Drag and drop the file from your computer or click to upload it, then click Submit.
Note - Set Geofence Parameters
When creating or importing geofences, define parameters such as geofence name, description, linked devices, and specific settings (e.g., radius for circles or boundary points for polygons) to tailor the geozone to your needs.
6. Notifications
- Notifications Overview: Notifications enable users to set up alerts based on various events generated within the Trazet application or by devices, triggered by specific conditions. Alerts can be received via email, as push notifications in the Trazet mobile app, or within the Trazet web application.
Creating Notifications
- Steps to Create a Notification
Navigate to the Notifications tab and select "Notification Settings". Configure the following:- Notification Type: Choose the notification type from the dropdown list.
- Name: Assign a unique name to the notification you are creating.
- Device: Select one or more devices to apply this notification to.
- Push Notification: Enable or disable this option to receive push notifications in the web and mobile applications based on your preference.
- Sound: Enable or disable to play a sound when receiving a new notification in the web application, according to your preference.
- Users: Select users from the dropdown list to be notified.
- Email: Enter one or more email addresses to notify users via email.
After completing the above steps, click Save Notification to store the notification.
- Notification Type: Choose the notification type from the dropdown list.
- Managing Notifications:
Created notifications are listed under "Notification Settings". Hover over a notification name to reveal management options: - Disable/Enable Button: Use this to disable the notification (stopping alerts) or re-enable a disabled one.
- Edit Notification: Click to modify the notification settings.
- Recycle Bin Icon: Click to delete the notification from the application.
- Disable/Enable Button: Use this to disable the notification (stopping alerts) or re-enable a disabled one.
- Special Notes:
- Type - Device Overspeed: Ensure the "Speed Limit" value is set in the device settings for this notification to function.
- Type - Geofence Enter/Exit: Verify that the device is correctly linked to geozones in the Geozone management page for proper operation.
Notification Logs
- Viewing Notification Logs
Received notifications are available under the "All Notifications" section. By default, the application displays logs for the current date. Use the calendar to select a custom time interval to view logs from a specific period. Scroll up or down to browse through the logs, and click on a notification to mark it as read and remove it from the list. - Filter and Search Logs
- Use the "Devices" filter to view logs for a specific device.
- Use the "Notification Type" filter to view logs for a specific notification type.
7. Reports
- Report Types
- Trips
- Description: Provides a detailed overview of all completed trips for selected devices over a specified time period.
- Details Included:
- Start Time
- End Time
- Mileage
- Duration of Trip
- Duration of Trip
- Average and Maximum Speed
- Start Address
- End Address
- Start Longitude/Latitude
- Stop Longitude/Latitude
-
- Use Case: Find accurate mileage based on GPS ,analyze travel patterns.
- Stops
- Description: Lists all stop events, detailing periods when a vehicle was stationary.
- Details Included:
- Stop Start Time
- Stop End Time
- Stop Duration
- Location Address
- Location Longitude/Latitude
- Use Case: Useful for detecting idle times, verifying rest stops, or identifying unauthorized stops.
- Events
- Description: Displays a log of events triggered by devices, including critical actions such as overspeed, geofence entry/exit, ignition on/off, and external power loss.
- Details Included:
- Event Type (e.g., overspeed, geofence entry/exit, ignition on/off, external power loss)
- Event Time
- Description: Displays a log of events triggered by devices, including critical actions such as overspeed, geofence entry/exit, ignition on/off, and external power loss.
- Location
- Location
- Use Case: Useful for tracking critical actions, ensuring compliance, and enhancing safety measures.
- Geofence
- Description: Records when and how often a device enters or exits specified geofences, providing insights into geozone interactions.
- Details Included:
- Geofence Name
- Entry Time
- Exit Time
- Use Case: Effective for monitoring geozone visits, detecting restricted area violations, or tracking arrival and exit times in delivery zones etc.
- Description: Records when and how often a device enters or exits specified geofences, providing insights into geozone interactions.
8. Users
User Types
- Own Users: Users you directly add under your Trazet account to grant access to devices and other resources.
- Invited Users: Users who already have a Trazet account under a different Trazet account, with whom you share access to your account’s devices and resources.
- Own Users: Users you directly add under your Trazet account to grant access to devices and other resources.
User Rights Types
- Read-Only: Limited permissions for viewing and analyzing data.
- Device Permissions:
- Dashboard & Individual device statistics
- Track device locations in live tracking
- Generate timelines and tracks for devices
- Generate reports for devices shred with the user
- Receive notifications when triggered for devices
- Resource Permissions:
- View geofences
- View notification logs
- Generate reports
- Device Permissions:
- Full Access: Complete control over the Trazet account, except for managing account subscription or billing.
- Device Management
- Dashboard & Individual device statistics
- Real-time device location tracking
- Generate device timelines and movement tracks
- Create, view, edit, and delete devices
- Resource Management
- Create, view, edit, and delete geofences
- Access notification logs
- Create, view, edit, and delete notifications
- Create, view, edit, and delete user accounts
- Generate system reports
Creating New Users & Managing Users
Adding a New User:
To add a new user to your Trazet account:
- Navigate to the My Organization tab.
- Select the Users tab.
- Click Add New User.
- Enter the user’s Email address. Ensure it is a valid email address.
- Select the Permission level from the dropdown menu (Read-Only or Full Access).
- Under Assigned Devices, select the devices to share with the user. You can choose multiple devices or click Select All to grant access to all devices.
- Click the Invite button.
Trazet will send an automated invitation via email to the user. If the user does not have an existing Trazet account, they will receive new credentials to access the Trazet application.
If the invited user already exists on the Trazet platform, they will receive a notification confirming access to your Trazet account.
For more details on managing multiple Trazet accounts, refer to the relevant section in this manual or visit --
Managing Users:
Account owners and users with Full Access permissions can view all added users in the Users tab on the My Organization page. The user list displays the following details for each user:
- User Name: The name of the user.
- Email: The email address of the user, which also serves as their username for accessing the Trazet application.
- Permissions: The access level assigned to the user (Read-Only or Full Access).
- Assigned Devices: The devices shared with the user, indicating which devices they are authorized to access.
- Change Permission Level: Click the current access level (Read-Only or Full Access) in the user list. A prompt will appear, allowing you to select a new permission level from the dropdown menu. Confirm to update the user’s access rights.
- Change Assigned Devices: Click the listed assigned devices in the user list. A prompt will appear, allowing you to select or unselect devices to update the user’s access. Confirm to apply the changes.
- Delete User: Click the Recycle Bin icon next to the user’s details to remove them from the Trazet account.